Run the setup for SQL like any program
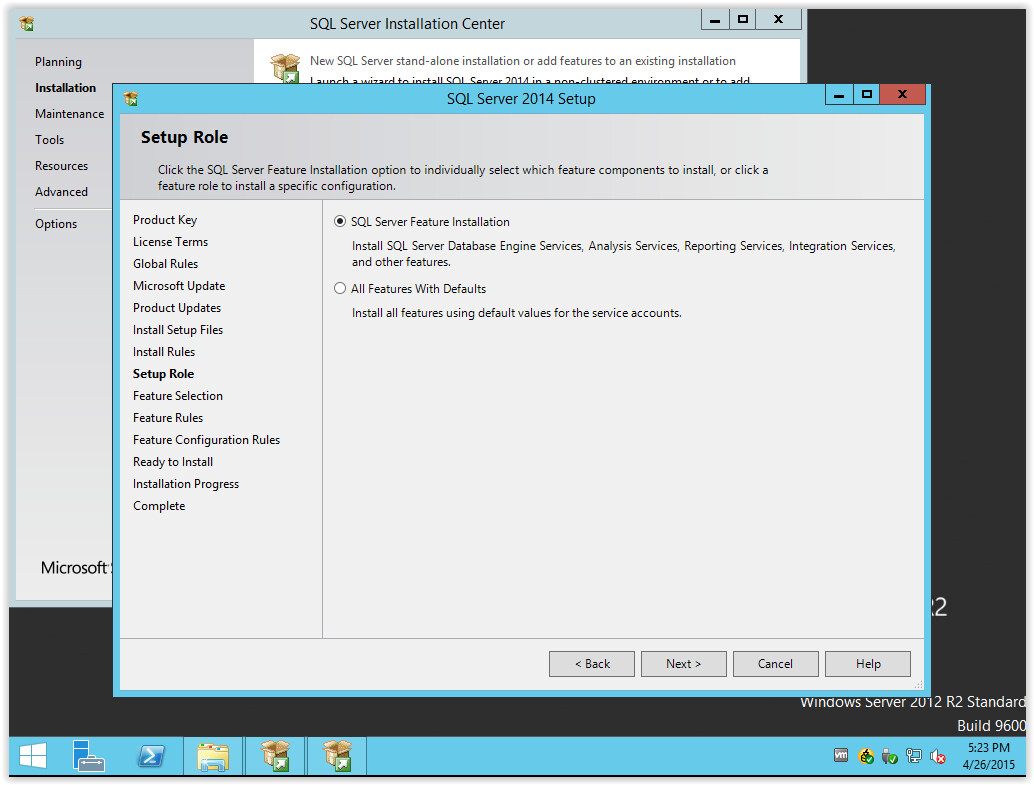
Choose Installation on the left and choose New SQL Server stand alone installation on the right.
If you are using SQL from an Open License agreement the serial number will be auto inserted as its tied to the downloaded media kit.
Accept the license agreement and continue by clicking next.
You can ignore the Windows Firewall and the Active Directory warnings if they show up here. If you get the message that .net framework is needed you will need to install this from the server console, then proceed to install SQL.
Choose SQL Server Feature Installation and click next
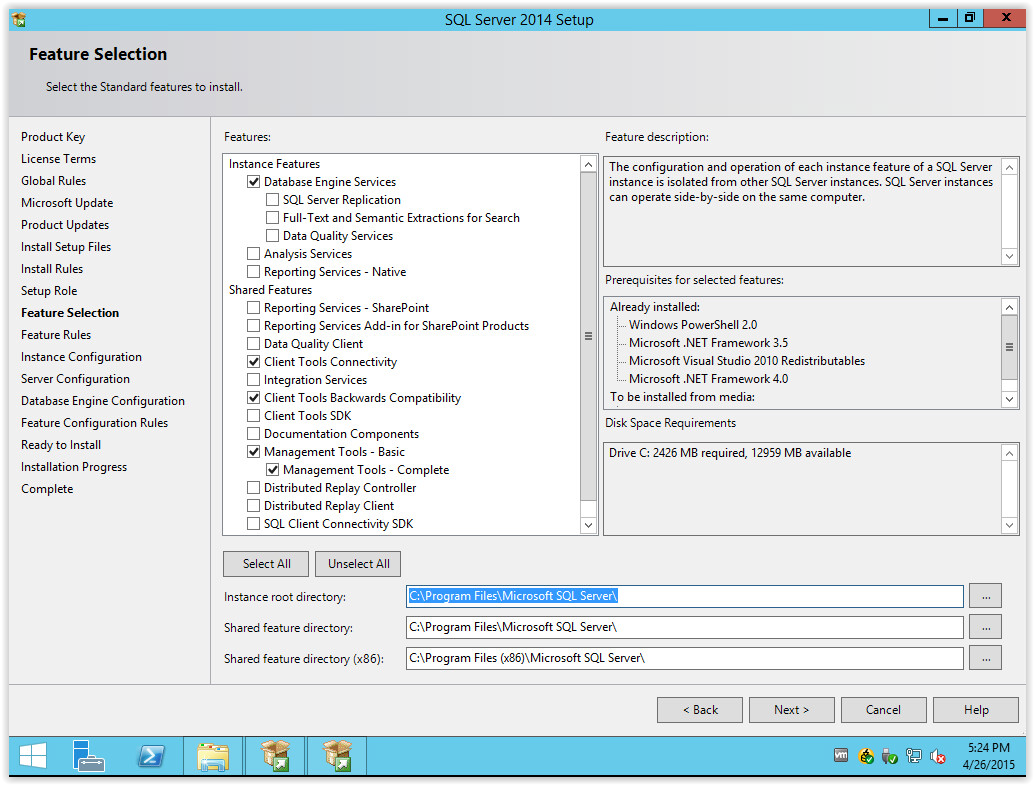
For Visual Shop you only need
Database Engine Services
Client Connectivity Tools
Client Tools Backwards Compatability
Management Tools - Basic
Management Tools - Complete
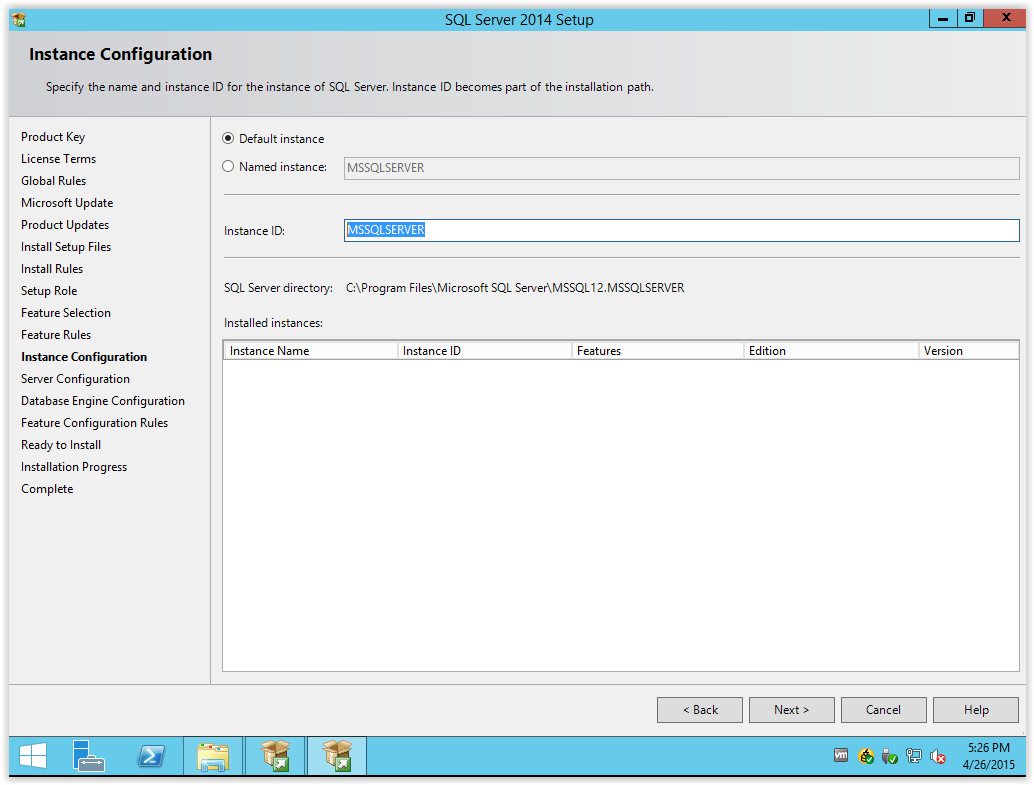
We prefer Visual Shop be installed on the default instance (known as MSSQLSERVER) but if this is in use you can specify a different instance name.
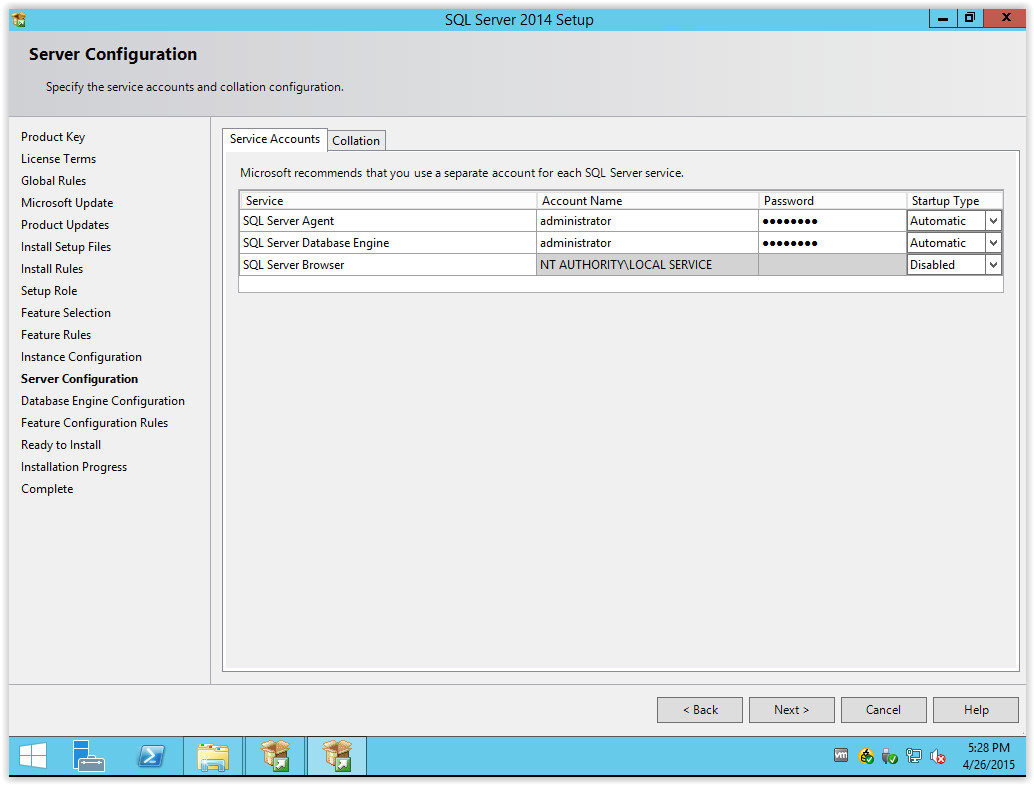
Set both services to start automatically and enter in an account with admin rights. This can be a local admin or domain admin account.
Once this is done click the collation tab at the top.
This step is critical, you must change the default collation to
SQL_Latin1_General_CP850_CI_AS
Click the radio button to enable Mixed Mode authentication, and enter a password for the account.
Click Add Current User at the bottom to specify the SQL Admin account.
Verify your settings and click Install
If installation is successful you will see it in this step.
Once the installation is done click the icon for SQL Server 2014 Configuration Manager
Enabled Named Pipes and restart the server (or the SQL Services).


Amazing
ReplyDelete